We are open Monday to Friday
Product Hotline - 01993 704 981
Local call rate - 0208 0909586
HOW TO SOUNDPROOF A CEILING
Sound proofing a ceiling can be considered when noise through a ceiling becomes unbearable. With the current popularity of removing carpets to expose floorboards or replace carpets with hardwood floors, a lot more noise is generated from the new floor as a result.
Impact noise is noise created by footsteps on the floor and chairs being dragged across the floor or children running around.
 If this impact noise is being generated in an older property that was constructed before the Part E regulations for noise control were introduced, the noise is being directly transmitted through the floor and ceiling into the room below. In addition, when soft carpets are replaced with hard surfaced floors, more airborne noise is created because there is less sound absorption in the room. This means that more reverberation (echo effect) is created with airborne noise bouncing off all of the hard surfaces within the room which amplifies the levels of sound being created making them more easily heard in other parts of the building. So, in floors that have not been previously treated to reduce noise nuisance through them, anyone living beneath will also be aware of a greater degree of airborne noise when the floor above suddenly becomes a hard surface. It does not matter what type of surface it is and can be tiles, laminate flooring, engineered wood flooring or simply the original floorboards being stripped and exposed.
All this is bad news for anyone living beneath and if they are unable to persuade the owners or tenants above to revert back to carpeted floors their only recourse is to consider upgrading the sound proofing of their own ceiling and what can be done will rely on the height they have available and the type of ceiling already fitted.
But first it has to be ascertained what type of ceiling is already in place. If it is the original lathe and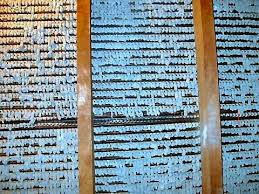 plaster ceiling, these often become unstable over time so the first thing to do is to screw up a layer of high density acoustic plasterboard to secure the ceiling. It is always a mistake to remove lathe and plaster ceilings because they are acoustically more efficient than plasterboard ceilings so adding a layer of plasterboard will also be adding mass which also helps block more noise.
We will now go on to describe the various options that can be considered when upgrading the sound proofing of a ceiling with the most efficient solution first.
1. First we need to consider what height is available because the more height that can be lost the more efficient any sound proofing upgrade of the ceiling will be. Victorian properties often have a lot of height so if there is enough space above the windows then the best solution would be to install an independent suspended ceiling beneath the original. (This solution will also save on heating bills because there will be less space in the room to heat).
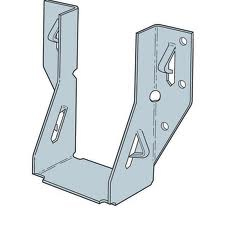 Now what type of suspended ceiling can be installed? If there is enough height, then sufficiently sized timber joists can be installed and supported on wall hangers with the tops of the joists at least 25mm down from the underside of the existing ceiling. With particularly long spans, the centre of the joists can be supported with wire hangers secured from the structural ceiling above but be sure to secure the fixing right through the ceiling to the structural joist. Now all that remains is to insert 100mm of AMW type acoustic mineral wool between the new joists supported with wire netting then screw to the underside of the joists 30mm (2 x 15mm) of high density acoustic plasterboard.
2. If there is insufficient height to install independent joists then another system is to install a thin metal 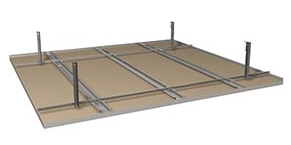 suspended frame such as the Gyproc MF system. This is a metal frame that is fixed directly to the structural ceiling above and has the advantage of being adjustable to suit any available height. The thin metal horizontal sections will not allow the same degree of noise transmission through them and so are more efficient than simply adding sound proofing directly to the ceiling.
Once the frame has been installed, install 100mm of AMW100 across the inside of the frame and will be supported by the frame so easy to fit. Then screw up the 30mm of high density plasterboard in the same way as described in section 1.
3. When there is not enough height to even consider the metal frame system, the next best thing is to screw up 50mm battens to the underside of the ceiling at 450mm centres. Next glue 50mm of AMW 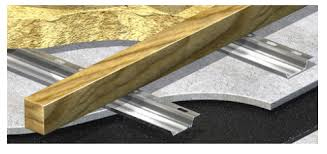 acoustic mineral wool to the ceiling between the battens. Now as you should know, the best sound proofing results are achieved when the ceiling is decoupled from the floor above and so with this system, Resilient Bars have to be screwed across the battens at 400mm centres. Resilient Bars are a 15mm deep thin metal decoupling system that supports the plasterboard ceiling beneath but as with the thin steel MF type frame already described, will significantly reduce the amount of structure borne sound from penetrating through from above. Once the bars have been fitted simply screw to them another two layers of 15mm acoustic plasterboard but be sure not to fix the screws so they short circuit through to the supporting battens because this will reduce their efficiency. All screws securing the plasterboard must be clear of the battens.
4. As long as the existing ceiling is just normal plasterboard and not lathe 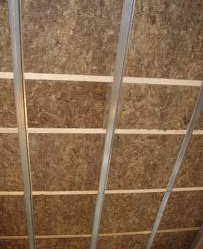 and plaster, another thinner system is to remove the plasterboard and fix Resilient Bars across the underside of the joists at 400mm centres. 100mm of AMW100 acoustic mineral wool can then be loosely fitted between the joists and sit on top of the bars. To finish, 30mm of acoustic plasterboard should be screwed to the bars ensuring the screws do not short circuit through to the supporting joists.
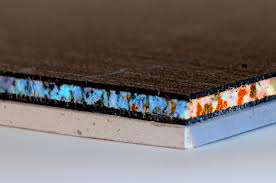 5. If removing the ceiling is not desired and there is not enough height to even consider the metal frame system, our QuietPanels originally designed as a thin sound proofing system for walls can also be screwed directly to the underside of ceilings. These are 27.5mm thick and incorporate a sound barrier system similar to our QuietFloor Plus for sound proofing floors which decouples the new plasterboard ceiling from the existing.
6. When this system isn’t possible or desired, another option is to glue our 1mm SoundBlocker Membrane to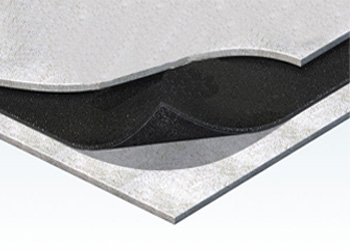 sheets of 15mm acoustic plasterboard then screw them as one to the ceiling. However, it must be appreciated that because this is the thinnest solution available to reduce noise through the ceiling, it is also going to be the least efficient but still better than it would have been without it.
When upgrading the sound proofing of any ceiling, it is absolutely essential that holes are not cut into the ceiling to allow for inset ceiling lights because these will significantly reduce the sound proofing efficiency. If inset ceiling lights are still required, acoustically rated ones can be used along with our acoustic hoods that help compensate for the hole. Holes for wiring surface mounted lighting should be sealed with acoustic sealant.
A link to our installation instructions for all of the sound proofing materials that we supply can be found on the right hand side of each product page on our web site.
For information on prices, go to soundproofing prices or ring Sound Service (Oxford) Ltd directly on 0845 363 7131 at local call rate from most landlines or 01993 704981 from mobiles.
